Archive | Uncategorized RSS feed for this section

Everybody Eat the Dinosaur.

18 Oct

I’m sorry, I really couldn’t resist. Following my foray into lyric appropriation a few posts back, I thought I’d repeat myself with an equally as admirable switcharoo. Genius.

Well at least I think so.

I apologise for the lack of posts recently. Despite claims from friends who shall remain anonymous (for now) that my blog is pure crap (I choose to think this is sarcastic), I know you’ve all missed me. However my life has become a constant whir of overdue uni work and an endless torrent of rental applications and, admittedly, I’ve barely any time to feed myself, let alone write about it. I’m living off carrots and muesli bars, people. Cue melancholy violins.

However all this frenzied mania has been somewhat relieved by a recent addition to my constantly growing collection of (often useless) kitchen appliances. The bread machine, ice cream maker, tofu kit and I have just welcomed a brand-spanking new blender to our brood. And what a change it has made.

I’ll be honest and say that I’ve only really made one thing with it so far, due to a new found obsession with chickpeas. I’ve probably had hummus for the past five days straight (with aforementioned carrots) but am in no mindset to stop. It’s just so easy and takes less time than two-minute noodles – which, for me, always take at least ten.

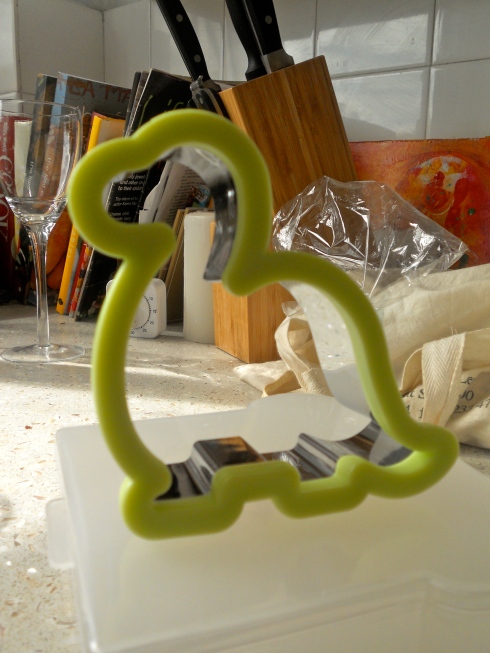
As well as the blender, I’ve also acquired a dinosaur-shaped sandwich cutter, courtesy of my dear flatmate who thought it would be the ultimate birthday gift. Thank you, dear friend. It was.

Dinosaur-shaped sandwich cutter!

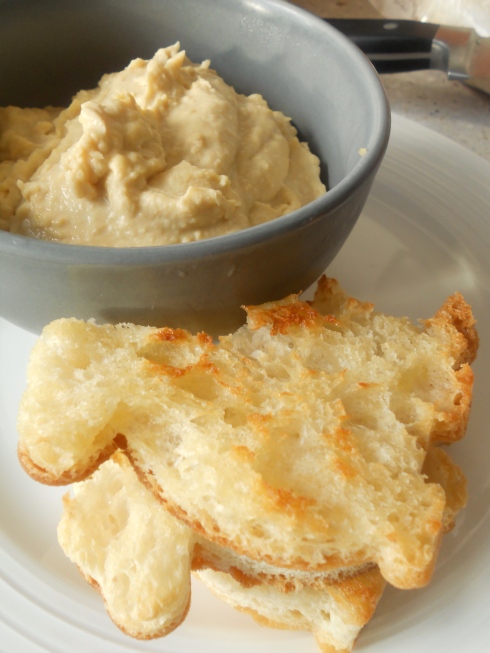
We’ve decided that everything will be dinosaur-shaped – sandwiches, biscuits, fried eggs, dumplings… You name it, we’ll cut it. So dumplings might be a bit difficult, but it does create the ideal accompaniment to hummus – dinosaur-shaped Turkish bread chips. Yeah, you wish you were as cool as us.


Hummus and dinosaur-shaped chips.

Hummus with (Dinosaur-Shaped) Turkish Chips

Serves 2

Hummus:

1 400g tin chickpeas, drained

1 TBSP tahini

1-2 cloves garlic (depending on your preference and whether or not you need to venture out into the general public afterwards)

1 TBSP lemon juice or white vinegar

1/2 cup extra virgin olive oil

salt

Turkish chips:

1 loaf Turkish bread

extra virgin olive oil

salt

1. Fit the blender with the chopping blade.

2. Place the chickpeas, tahini, garlic and lemon juice or vinegar in the bowl of a food processor.

3. Pulse until everything is well combined.

4. With the motor running and everything blending, add the olive oil in a steady stream until the mixture resembles a thickish paste. Season with salt to taste.

5. Remove the bowl from the machine and place the hummus into a serving bowl.

6. Refrigerate for 30 minutes.

7. Meanwhile, make the (dinosaur-shaped) Turkish chips.

8. Preheat the oven to 200C.

9. Split the Turkish bread in half like you would a bread roll, so there’s a top and bottom. Sorry, this is the best explanation I can muster.

10. Cut each half into smaller triangles (or dinosaurs) and place on a baking tray. You may need to do a few batches.

11. Brush with olive oil and sprinkle with salt.

12. Bake in the oven for around 10-15 minutes or until crisp.

13. Remove from the oven and leave to cool.

14. Serve with the hummus.

*NOTE: Hummus is one of those things where everyone has a preference: more garlic, less lemon and so on. Feel free to change the recipe to your liking.
Ain’t Potato the Sweetest Thing.

2 Oct

As you can see, I have an uncanny knack for appropriating song lyrics. A high point (or low, depending on which way you look at it) was when my flatmate and I changed the lyrics to ‘California Gurls’ (sic) by Katy Perry and instead made the song about California rolls. We even proposed taking it to our local sushi joint so they could frame it on the wall. Look, it made sense at the time.

So OK, I might not be destined for a lifelong career in lyric appropriation (if there is such a thing) but I can show you how to make a mean quiche. And ultimately that will take me further than wailing at the top of my lungs about how I know a place where the sushi’s really fresher.

Quiches are so easy and, in their most basic form, only take a matter of minutes to whip up. The extra bonus is that they stretch for days, making excellent cold lunches. I was lucky that I had the time to make my own pastry but by all means take the cheat’s way out and just use store-bought shortcrust. The filling can be chopped and changed according to what you like and what you can afford. Ham, chicken, cheese, herbs, tomatoes and various other vegetables make wonderful additions. And don’t do what I stupidly did and spend $2.50 on a single sweet potato – use pumpkin as a cheaper substitute.

I can assure you that this quiche is so good, the club can’t even handle it right now. I really don’t know what that means.

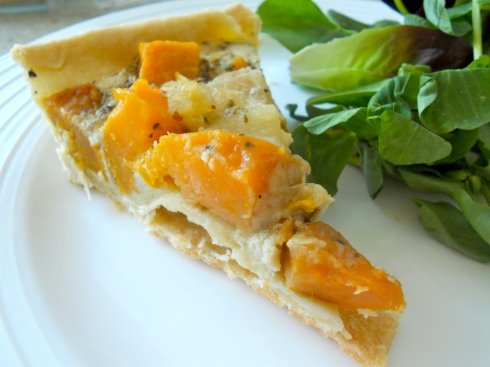
Sweet Potato and Caramelised Onion Quiche.

Sweet Potato and Caramelised Onion Quiche

Serves 3-4 (for days)

Pastry:

1 3/4 cups plain flour

125g chilled butter, chopped

1/2 tsp salt

2 tsp iced water

Filling:

2 TBSP olive oil

500g sweet potato, peeled and diced (or pumpkin)

1 large brown onion, peeled and sliced into rings

1 tsp brown sugar

4 eggs

1/2 cup milk

1 TBSP dried mixed herbs

salt and pepper

1. In a large mixing bowl, rub together the butter, salt and flour with your fingers until the mixture resembles fine breadcrumbs.

2. Add the water and combine to form a dough. You made need to add more water or flour, depending on the consistency of the dough. It should resemble play dough.

3. Wrap the dough in cling wrap and refrigerate for 30 minutes.

4. In a medium saucepan, place the sweet potato and enough water to cover it. Add a pinch of salt. Bring it to the boil.

5. Remove the sweet potato from the heat when it is just cooked through and drain. Leave to cool.

6. In a medium fry pan, heat 1 TBSP of the olive oil.

7. Add the onions and fry until soft.

8. Add the sugar and keep frying until the onion caramelises. Remove from heat and leave to cool.

9. Preheat the oven to 200C and grease a 22cm pie dish or tart tin.

10. Remove the pastry from the fridge and roll out until it’s big enough to cover the dish/tin.

11. Line the dish/tin with the pastry and place in the fridge for a further 15 minutes.

12. Whisk the eggs with the milk and herbs.

13. Add the cooled onion and season to taste.

14. Remove the pastry shell from the fridge and place in the oven for 15 minutes.

15. Remove from the oven and cover the pastry with the sweet potato. Then pour over the egg mixture.

16. Reduce the oven temperature to 180C and bake the quiche for 30-40 minutes or until the top is slightly browned.

17. Serve.

Ain’t Nuffin’ Bad about a Muffin.

11 Sep

I’ll admit that I’ve got a bit of a shopping addiction. I buy clothes I really don’t need (and half the time like), lip balms to add to my collection of thousands, food that I’ll never get around to eating and other things which I really can’t explain. Such as the miniature plastic skeleton currently sitting in my top drawer.

But cookbooks are the one thing that I know won’t go to waste. The most recent addition to my ever-expanding collection is the Muffin Bible by Penguin Books. It’s a cute little compendium containing simple and easy-to-follow recipes for all kinds of muffins, from healthy Oat & Orange to OTT-dessert-disguised-as-a-muffin-which-makes-it-seem-OK Self-Saucing Chocolate ones. The recipes only contain a few ingredients, making them ideal for a quick baking jaunt during study breaks. Or, if you’re anything like me, a fantastic replacement for study altogether.

The Muffin Bible.

I bought this book on a whim, with a huge craving for muffins. I wanted something easy and cheap, preferably using ingredients we already had. My criteria led me to the Strawberry Muffins which only required the extra purchase of strawberries. Flour, eggs, milk and its various other, very basic, constituents were sitting in the cupboard at home.

The muffins are wonderfully moist, with the strawberries becoming almost jammy in texture and taste. We used fresh ones (see sidebar), but tinned could easily work. The muffin itself is heavy with cinnamon, a delicious companion to strawberries, and not too sweet. For this reason it could almost pass as being in the same category as the aforementioned Oat & Orange. Well, at least that’s what I’m now telling myself after devouring three.

Strawberry Muffins.

Strawberry Muffins

Makes 12

3 cups plain flour

1/2 cup raw sugar

1/2 cup brown sugar

1 TBSP baking powder (I used 1 TBSP of bi-carb soda and they were fine)

1 tsp cinnamon (optional)

125g butter, melted and cooled slightly

3 eggs

1 cup milk

1 1/2 cups chopped strawberries

1. Preheat the oven to 200C and grease a 12-cup muffin tin.

2. In a large bowl, mix together the flour, sugars, baking powder and cinnamon.

3. In a separate bowl mix together the butter, eggs and milk.

4. Add to the dry ingredients and then fold in the berries. When making muffins it’s important not to over mix the batter. You don’t want the wet and dry ingredients to be completely mixed in; lumps of flour are a good sign. Don’t be scared.

5. Spoon the batter into the tin and bake for 20 minutes.

6. Serve hot or cold.

Let’s Toast to the Roast.

24 Aug

Nothing beats a good roast dinner. It covers all the major food groups (protein, carbohydrate, vegetable… sometimes) and tastes utterly delicious. It’s easy to prepare, doesn’t require loads of time devoted to it and, best of all, stretches for days with leftovers. Beef can be used for sandwiches, stews and stocks; lamb for, well, the same; and chicken for all of the above as well as pasta and salads. The roast really is the best all rounder.

There are so many different flavour options when roasting meat. You can go Moroccan or Indian with spicy marinades and rubs, Italian with herbs like basil and oregano, French with garlic or tarragon, or Australian with funky brown lacquer and bready stuffing. But I like to keep it simple with garlic, lemon, salt and pepper. Again, the roast’s diversity makes it an almost perfect meal.

Now when purchasing your chosen meat, don’t be daunted by the seemingly expensive price tag. Sure, the meat might set you back 10 to 20 dollars, but when considering its long life and versatility, it really is worth it. You can always pick up meat on special and, if you’re really desperate, buy one of those two-chickens-for-5-dollars deals. I did once, and, although they were tiny and the meat almost non-existant, bar the chewy scraps found on the thighs, they managed to satisfy my roast craving.

But do go for the best you can afford. On this particular instance, we were lucky enough to have two other people putting in for the chicken and decided to go free range. The quality of the meat is considerably better – producing a more tasty and moist end result. It’s also a more ethical, chicken-friendly way to go.

As a side note, I apologise for the retro, ’70s era-looking photo. Fixing up the effects of bad fluro lighting is quite hard.

Retro Garlic and Lemon Roasted Chicken.

Garlic and Lemon Roast Chicken with Herbed Potatoes

500g potatoes, washed and chopped into quarters

2 TBSP olive oil

1 TBSP dried mixed herbs

1 medium-size whole chicken

1/2 a lemon

7 cloves of garlic

50g butter

salt and pepper

1. Fill a medium saucepan with cold water and add the potatoes.

2. Bring to the boil and then reduce to a simmer, covering the saucepan with a lid.

3. Once the potatoes are almost fully cooked (there should still be some resistance when pierced with a fork), remove from the heat and drain.

4. Place back in the saucepan with the olive oil and herbs and season well with salt and pepper.

5. With the lid on, shake the saucepan around to coat the potatoes. This will also give them a rough surface for roasting, which produces a crisper exterior. But seriously, make sure you hold on tight to that lid. A hot potato to the face can hurt.

6. Preheat the oven to 200C.

7. Place the chicken in a roasting pan and squeeze the lemon juice all over it.

8. Place the squeezed lemon inside the cavity, along with the cloves of garlic.

9. Peel back the skin on top of the breast and stuff half the butter down each side. Basically the butter will be between the skin and the meat.

10. Rub the remaining butter all over the chicken. As well as producing a nice crisp skin, it’s very therapeutic.

11. Season liberally with salt and pepper.

12. Scatter the potatoes around the chicken and place in the oven.

13. Roast for around 45 minutes to an hour, or until the skin browns and the potatoes are crisp.

14. Serve.

Bake Away Your Blues.

16 Aug

I get emotional a lot. No, don’t worry. This won’t be a rant about the perils of student living and the amount of work it seems to take to keep things afloat – uni work, work work, social work (and not the kind that benefits society), love work and all that other mundane work – but I just thought I’d establish that sometimes life gets too much.

I could take the easy way out and drop out of uni, waste glorious amounts of time and eat myself stupid, whilst being a full time blogger that earns zilch from her craft but does it anyway to entertain her one reader – but that doesn’t seem all too far removed from what I do already. And there’s an easier way to do away with student blues.

I know I’ve harped on about it before but I’ll torture you all and do so again.To me the best way to distract myself from all that’s gettin’ me down is to bake my little heart out.

Today I had a strong urge to make choc chip cookies. There’s something nostalgic and cheerful about them that is the perfect antidote to, well, life. Most recipes call for actual chocolate chips but a look at the price of even the smallest packet was a very rude awakening. To me they’re poor value for money unless you buy a generic brand, which I’m often wary of. So instead I say take the cheaper way out and buy a large block of chocolate. Not only is it more affordable, you can also get a bit of variety to spice up your biscuits – hazelnuts, almonds, and other types of nuts make wonderful additions.

Following my bake-a-thon my emotions are a little more stable. The therapeutic nature of baking lies in its rhythmic calm: sifting flour, measuring things and mixing and pouring and licking the bowl. There are no mentions of Foucaultian theories or global economics or the human anatomy. No customers to pester you with ridiculous questions. No drama, no fights, no plot lines to rival a bad daytime soap. The only work involved is easy and makes perfect sense and produces a delicious end result. Not only will you cure your own bout of doom and gloom but you’ll probably make someone else’s day a little sweeter, too. Naw.

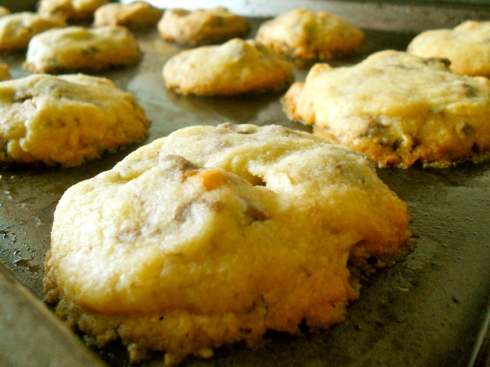
Hazelnut Choc Chip Cookies.

Hazelnut Choc Chip Cookies

Makes 20

150g butter, softened

1 tsp vanilla essence

3/4 cup caster sugar

3/4 cup plain flour

1/4 cup corn flour

200g hazelnut milk chocolate (any type of chocolate is fine), roughly chopped into choc chip-sized pieces

1. Preheat oven to 180c/160C fan forced. Grease an oven tray and line it with baking paper.

2. With an electric mixer, beat together butter, vanilla and sugar in a medium bowl until light and fluffy.

3. Sift the two flours into the butter mix and stir well to combine.

4. Add the chopped chocolate and combine.

5. Using your hands, shape the dough into tablespoon-sized balls and place 5cm apart on tray.

6. With your fingers or with a fork, flatten the balls slightly.

7. Bake in the oven for 15 minutes or until the cookies are golden brown.

8. Remove from oven and cool on trays.

The Very Humble Pie.

25 Jul

I liken this pie to a Picnic bar. No, it doesn’t contain chocolate. Nor does it contains caramel, rice crisps or nuts. And OK, it’s not even sweet and, instead of being unquestionably bad for you, it actually contains a good dose of daily vitamins and minerals. You’ll throw my comparison back in my face now and tell me that this pie is nothing like a Picnic bar, but I assure you, dear reader (singular, for I am convinced my flatmate is my only regular), that it certainly is.

It’s ‘Deliciously Ugly’.

For those of you outside of Australia (and you probably aren’t. See previous brackets), this was the slogan attached to the scrumptious yet clearly aesthetically displeasing chocolate bar some years ago.

Look at the photo below and you’ll see, in all honesty, a pretty ugly pie. But don’t be put off by its appearance. In a rare moment of expanding the number of her food-related adjectives from one to two, my flatmate described this pie as ‘very tasty’. I’m not sure and could easily be mistaken, but she may have even slipped in a ‘so’.

If you break down the cost for this pie, sure, it’s a little pricey. But it lasts for days, making fabulous lunches and quick dinners for when you really couldn’t be bothered to even order in takeaway. Stow it in the fridge and heat it up, or eat it cold – it’s actually better this way.

Spinach and Three-Cheese Pie.

Spinach and Three-Cheese Pie

1 TBSP olive oil, plus extra to grease the pie dish

1 medium brown onion, roughly chopped

5 cloves of garlic, crushed and finely chopped

750g frozen spinach, defrosted

1/2 cup water

100g smooth ricotta

1 cup grated tasty cheese

2 TBSP parmesan cheese

2 sheets puff pastry

salt and pepper

1. Heat oil in a large, heavy-based pot over medium heat.

2. Add onion and garlic and fry until soft.

3. Add spinach and water, stir, and leave on medium heat until spinach has broken down.

4. Add the three cheeses and stir to combine.

5. Season to taste and leave to cool completely.

6. Preheat the oven to 220C.

7. Using a 22cm pie dish as a guide, cut two circles from the pieces of pastry. One that is the same diameter as the dish and a circle that is one inch wider around. Basically the pie dish will be a smaller circle sitting inside a bigger one.

8. Grease the pie dish and line it with the larger circle of pastry so that it comes up the sides.

9. Place the spinach mixture inside the pie dish, on top of the pastry.

10. Place the smaller circle on top of the spinach mixture and pinch together with the base to seal.

11. Pierce the top of the pie with a knife to let out excess steam.

12. Place in the oven and bake for 25-30 minutes or until the pastry is golden.

13. Cut into wedges to serve.

Blog Lovin’.

14 Jul

Just some blatant self promotion.

Follow my blog with bloglovin

Better Brittle.

7 Jul

Let me take you back to when I was seven and trying to make my first batch of toffee. Not having the greatest knowledge of what would and wouldn’t work when extreme heat was applied, undoubtedly the results were pretty disastrous.

To give myself some credit, I knew toffee contained sugar. But to give this creation a bit of a twist, I decided to substitute honey instead. And to make it extra exotic? Some desiccated coconut.

I bung it all in a pan, put the hotplate on its highest setting and waited for something to happen. The finished product was a strange paradox: a gloopy yet burnt and crispy mess, sweet but at the same time bitter from charcoaled coconut, impossible to get out of the pan, yet capable of oozing out and sticking to everything else.

Needless to say, the pan ended up in the bin and I, in the naughty chair.

I’ve been scarred ever since and it’s only 12 years later that I’ve had the courage to attempt to cook toffee again. And possibly because I now have a better culinary knowledge, it worked.

Sugar can be really hard to work with and making toffee is all about precision. Don’t cook it long enough and you’ve just got a syrup. Cook it too long and you’ll end up with something akin to my honey-coconut concoction. They say that getting the timing right is difficult without a candy thermometer (something which the average person, myself included, probably doesn’t even own) but it is possible.

This recipe is more like a brittle, with the addition of nuts making it so. The chocolate gives it an extra bit of (unnecessary) richness, making this a pretty decadent sweet. Now it probably won’t be as perfect as something you’d buy commercially but for a homemade attempt it’s pretty good. Just make sure you don’t try to give it a bizarre exotic twist.


Dark Chocolate Peanut Brittle.

Dark Chocolate Peanut Brittle

2 cups caster sugar

1/2 cup water

1 cup roasted, unsalted peanuts

50g butter

200g dark eating chocolate, melted

1. Line a baking tray with baking paper, or grease it really well.

2. Combine the sugar and water in a medium saucepan. Stir over low heat without boiling.

3. Bring to the boil over a high heat and cook, uncovered, without stirring for 10-15 minutes, or until the mixture is golden brown. You want it to look like this:

Caramelised sugar.

4. Remove the pan from the heat and allow the bubbles to subside. Stir in the peanuts and the butter.

5. Pour the mixture onto prepared tray and leave to set at room temperature.

6. Spread the chocolate over the brittle.

7. Chill in the fridge for 10 minutes or until the chocolate sets.

8. Break into pieces to serve.

Yumbo Italiano.

19 Jun

For those of you not familiar with the late 90s/early 2000s hit ‘Mambo Italiano’, that was the inspiration for the name of this post. I’ve noticed that my creativity with post names is pretty poor and this is probably a new low. Apologies.

Moving along. I recently purchased two new cookbooks – a gift to myself to celebrate the end of the uni semester. Initially I intended to only get one and savour it over the six week break but I gave into temptation and overdrew my bank account for the sake of expanding my culinary knowledge. The two books I bought are part of the same series – ‘The Food of France’ and ‘The Food of Italy’. Each is a 300-odd page tome of wonderful recipes and information about the cultures themselves, with amazing pictures of both the food and countries.

The books are fantastic introductions to each cuisine. The recipes are authentic enough that you’re not left only having spaghetti Bolognese and chocolate mousse as dining options but basic enough to let you avoid having to make your own foie gras.

The difficulty of each recipe varies but thankfully they range from easy four-ingredient salads to elaborate you’ll-be-preparing-for-weeks terrines. Basically there’s something for everyone, even me, the humble and penniless student.

In order to prevent her from throwing me out and finding a better replacement, I usually leave it up to my flatmate to choose what we have for dinner. Tonight’s choice? Pizza. From scratch.

Now you might be thinking that making your own pizza dough is completely impossible – but you’d be pleasantly surprised. Even my flatmate (who has only just mastered a basic pasta sauce) was amazed at how easy it was. And cheaper. The recipe may seem involved but don’t be daunted.

A packeted base will cost up to $6, but the homemade option? If you’ve got basics like flour, olive oil, sugar and salt and are willing to fork out $2.50 for a box of yeast sachets, this one will cost about 20c. The sauce can again be made from what’s in the cupboard. The lack of bizarre and surely unhealthy ingredients is a bonus too.

The finished product is pretty damn good. The dough is fluffy yet crisp, the sauce a mile better than anything from a bottle. I highly recommend you get into making your own pizzas – they’re an insanely cheap option that really beats the frozen variety.

This recipe is the most basic but you can add anything to the top.

Pizza margherita

Pizza Margherita (courtesy of ‘The Food of Italy’ by Murdoch Books)

Makes two 30cm (12 inch) pizzas

For the dough:

1 TBSP caster sugar

1 sachet dried yeast

215ml lukewarm water

450g (3 ⅔ cups) plain flour

½ tsp salt

3 TBSP olive oil

For the sauce:

1 TBSP olive oil

2 cloves garlic, finely chopped

One 400g tin diced tomatoes

2 TBSP tomato paste

1 TBSP mixed dried herbs

salt and pepper

1 TBSP olive oil

20 small basil leaves or 10 large ones

300g grated mozzarella cheese

For the dough:

1. Put the sugar and yeast in a small bowl and stir in 90ml of the water. Leave in a draught-free spot to activate. If the yeast does not bubble and foam in 5 minutes, discard it and start again.

2. Mix the flour and salt in a bowl. Add the olive oil, remaining water and the yeast mixture. Mix until the dough loosely clumps together.

3. Transfer to a lightly floured surface and knead for 8 minutes, adding a little flour or a few drops of warm water if necessary, until you have a soft dough that is not sticky but is dry to the touch.

4. Rub the inside of a large bowl with olive oil. Roll the ball of dough around in the bowl to coat it with oil, then cut a shallow cross on top of the ball with a sharp knife.

5. Leave the dough in the bowl, cover with a tea towel and leave in a draught-free spot for 1-1 ½ hours until doubled in size.

6. Meanwhile, make the sauce.

7. Punch down the dough to its original size, then divide into two portions.

8. Working with one portion at a time, push the dough out to make a thick circle. Use the heels of your hands and work from the centre of the circle outwards, to flatten the dough into a 30cm (12 inch) circle with a slightly raised rim. You can also use a rolling pin if this is a little difficult.

For the sauce:

1. Heat the oil in a medium saucepan over medium heat.

2. Once hot, add the garlic and fry for 3 minutes or until soft.

3. Add the tin of tomatoes, tomato paste and herbs.

4. Stir and leave to simmer for 10 minutes.

5. Check the seasoning and add salt and pepper accordingly.

6. Remove from heat and leave to cool.

To assemble:

1. Preheat the oven to 240C.

2. Place each pizza base on a separate tray that has been rubbed with olive oil to avoid sticking.

3. Spread each base with tomato sauce, spreading it up to the rim.

4. Scatter with the basil leaves and mozzarella.

5. Bake for 12-15 minutes or until golden and puffed.

6. Remove from the oven and cut accordingly.

Welcome, welcome to my humble blog.

1 May

I’ve always meant to start a blog but never had the time (read: the motivation) to sit down and treat myself to hours of narcissistic self-indulgence.

But so many around me are jumping on the blogging bandwagon so I thought it was high time I jumped on too. I mean, who doesn’t have a blog these days? It’s, like, totally the trend du jour along with Justin Bieber and tired jokes about Kate’s party.

So what, you might ask, is my blog to be about? Well, I’ve never been one to divulge my personal issues online (wanky Facebook statuses aside) so something about my day-to-day life is out of the question.

But I do love food and have wanted to write about food for a long time now. I know, I know, there are millions of food blogs on the net and why should mine be any different? To be honest, it’s probably not. I think almost every niche possible has been covered in the blogosphere.

But I’ll try to give you the hard sell anyway. Many food blogs review expensive restaurants and food shops, helping gourmands know where to go to get the best Russian caviar or French truffles. This one doesn’t.

Others have elaborate recipes that one can marvel at but never have the courage to try and accomplish. Don’t expect that here.

And others still combine the two, making me question where on earth they get the time to eat, cook, blog and maintain a normal life. I’m not one of those people.

It may seem I’ve done a terrible job of convincing you to keep reading but the lack of luxury dining and insane culinary skill is where my blog gets its hook.

I’m a student and a poor one at that. Having recently moved out of home, my budget is very limited in terms of what I can cook and where I can eat out. I try to make the most of what I’ve got, creating fairly decent meals for my flatmate and myself out of very basic ingredients.

I think there’s a lack of guidance out there for students living out of home. I hear of so many of my counterparts eating loads of Mi Goreng and take away (which is often expensive).

I guess I just want to show that cooking your own food can be easy and affordable. I do love to cook but I’m no Masterchef. I’m not here to provide recipes for those with astounding cooking expertise to master them. Cooking can be simple and especially for a student who’s already hard-pressed for time, balancing work and university and a moderate amount of social activity, it really needs to be.

Most of the time I make stuff up – adding a pinch of this and a handful of that. Rarely do I measure things when I’m using my own judgment. Often this means things need a LOT of tweaking before they’re edible and things so strange they work make their way into my food. But never fear – everything I put on here is tested by my incredibly critical flatmate who proclaims my food as ‘tasty’ or ‘OK’ (she’s also evidently articulate). You’ll only see ‘tasty’.
I also want to try the cheapest places to eat around Sydney. The dingy and often slightly unhygienic student haunts. Eating out doesn’t have to cost the world, nor a week’s rent.

Occasionally I’ll splash out and spend more than $5 on a single item but hey, you need the odd indulgence to maintain your sanity.

So here it is: a documentation of my years out of home and what I’m cooking and eating to get through them.